
[VoIP] Cisco 8861 SIP Connect

Cisco 8861를 최근에 구매하여, VoIP를 운영하고 있는 서버에 접속시키려고 하였다.
Enterprise firmware가 올라가 있는 상황에서는 Custom SIP서버에 접속 할 수 없는 것을 확인 하였다.
Cisco의 CUCM 서버에만 접속이 가능한게 Enterprise 펌웨어이고, 3PCC(MPP)펌웨어는 Third Party 서버에 접속 할 수 있는 기능이 있다.
최신버전 또는 미리 설치되어있는 firmware에서는 SIP 서버를 접속 할 수없어, MikoPBX에 연결할 수 있는 방법이 없다.
이로 인하여 3PCC 펌웨어를 구해 덮어 씌웠지만, 3PCC 펌웨어를 사용하려면 Migration Licence가 필요로 한다.
upgrade.cisco.com 에서 firmware를 올릴 수 있는데, licence가 필요하다.
Licence의 가격은 150$정도 하고, 파트너 사에 연락하여 구매를 해야하는 번거로움이 있다. IP Phone을 10만원에 가져왔는데, 150$짜리 licence를 구매하기에는 너무 아까워 방법을 찾다보니, 10-3버전의 펌웨어를 사용하면 Custom SIP Server에 접속 할 수 있다고 Reddit에서 확인 하였다.
upgarde.cisco.com에 있는 IP주소 3.14로 시작하는 쪽으로 TFTP를 보고 TFTP서버를 만들면 펌웨어 업그레이드를 할 수 있다고 생각하여, TFTP서버를 구동하였다.
(Windows에서는 TFTPD64를 사용하여 TFTP Server를 열 수 있다)
DHCP 서버는 이미 동작중에 있기에, 따로 DHCP서버는 구성하지 않고, 있는 DHCP를 사용하였다.
(Web -> Admin login -> Advanced -> Phone -> Provisioning -> Firmware -> Upgrade rules -> tftp://{tftp_server}/{file_name}.loads
3PCC Firmware에서는 다음과 같은 메뉴에서 tftp서버에 있는 파일을 불러오면 된다.
Cisco TFTP Server 구조
Cisco IP Phone에서는 자동 Provisioning 기능을 갖고있어, 편리하게 프로비저닝을 할 수있다.
우리는 이 provisioning 기능을 가지고 firmware update 및 Provisioning을 할 예정이다.
Cisco IP Phone에 enterprise 펌웨어가 올라가있고, Alternative TFTP 서버 옵션에 IP가 들어가 있으면, 해당 tftp 서버에 이것 저것 파일을 요청을 하게 된다.
대표적인 예로, XMLdefault.cnf.xml, SEP{mac}.cnf.xml 등이 있다.
Firmware update
Firmware update를 위해선, XMLdefault.xml파일을 수정하여 firmware update를 진행 할 수 있다.
<Default>
<autoRegistrationName>AUTO-REG</autoRegistrationName>
<autoRegistration>disabled</autoRegistration>
<selfProvisioningSecureMode>true</selfProvisioningSecureMode>
<adminProvisionMode>false</adminProvisionMode>
<ipAddressMode>0</ipAddressMode>
<ipPreferenceModeControl>0</ipPreferenceModeControl>
<ipMediaAddressFamilyPreference>0</ipMediaAddressFamilyPreference>
<callManagerGroup>
<name>Default</name>
<tftpDefault>true</tftpDefault>
<members>
<member priority="0">
<callManager>
<name>cucmpub1</name>
<description>cucmpub1</description>
<ports>
<ethernetPhonePort>2000</ethernetPhonePort>
<sipPort>5060</sipPort>
<securedSipPort>5061</securedSipPort>
<mgcpPorts>
<listen>2427</listen>
<keepAlive>2428</keepAlive>
</mgcpPorts>
</ports>
<processNodeName>cucmpub1</processNodeName>
</callManager>
</member>
</members>
</callManagerGroup>
<TVS>
<members>
<member priority="0">
<port>2445</port>
<address>cucmpub1</address>
</member>
</members>
</TVS>
<loadInformation36217  model="Cisco 8811">sip88xx.11-2-3MSR1-1</loadInformation36217>
<loadInformation683  model="Cisco 8841">{loads_file_name}</loadInformation683>
<loadInformation684  model="Cisco 8851">{loads_file_name}</loadInformation684>
<loadInformation685  model="Cisco 8861">{loads_file_name}</loadInformation685>
</Default>
위와 같이, 자신이 갖고있는 Cisco IP Phone에 관련된 정보를 수정하여 업데이트 파일을 지정하면, 알아서 업데이트가 진행이 된다.
윈도우 상에서 진행하게 되면, tftpd64 또는 tftpd32를 사용하는데, log 부분을 보면 파일을 load 하는 모습을 볼 수 있다.
업데이트가 완료되면, 자동으로 reboot이 되며, 다음 Step으로 넘어가도 좋다.
Setting -> Admin settings -> Ethernet Setup -> IPv4 Setup -> Alternative TFTP -> TFTP server Address
순으로 입력하면, Cisco IP Phone은 TFTP서버에 접속할 수 있게 된다.
Provisioning the IP Phone
이제 10-3펌웨어를 올렸으니, SIP Server의 정보를 넣어, 실제 Third Party 서버에 접속시키도록 하자.
먼저 TFTP 서버 구조에서 살펴본 것 처럼, SEPMAC.cnf.xml 파일이 있다.
Custom TFTP 서버에 연결을 하여 불러오는 파일 중 하나로, Provisioning에 관련 된 정보를 불러온다.
파일 명은 Cisco 장비에 있는 MAC Address를 기반으로 불러오기에, SEP0000000000.cnf.xml 파일 명으로 진행한다.
이 포스트에서는 SEPAABBCCDDEE.cnf.xml을 기준으로 진행한다.
<?xml version="1.0" encoding="UTF-8"?>
<device xsi:type="axl:XIPPhone">
    <versionStamp>{Jan 01 2002 00:00:00}</versionStamp>
    <loadInformation>P0030801SR02</loadInformation>

    <devicePool>
        <dateTimeSetting>
            <dateTemplate>YY.M.D</dateTemplate>
        </dateTimeSetting>
        <callManagerGroup>
            <members>
                <member priority="0">
                    <callManager>
                        <name>Asterisk</name>
                        <description>Asterisk</description>
                        <ports>
                            <ethernetPhonePort>2000</ethernetPhonePort>
                        </ports>
                        <processNodeName>{SIP_Server_IP}</processNodeName>
                    </callManager>
                </member>
            </members>
        </callManagerGroup>
    </devicePool>
      <sipProfile>
    <sipProxies>
      <registerWithProxy>true</registerWithProxy>
    </sipProxies>
    <sipCallFeatures>
      <cnfJoinEnabled>true</cnfJoinEnabled>
      <callForwardURI>x-cisco-serviceuri-cfwdall</callForwardURI>
      <callPickupURI>x-cisco-serviceuri-pickup</callPickupURI>
      <callPickupListURI>x-cisco-serviceuri-opickup</callPickupListURI>
      <callPickupGroupURI>x-cisco-serviceuri-gpickup</callPickupGroupURI>
      <meetMeServiceURI>x-cisco-serviceuri-meetme</meetMeServiceURI>
      <abbreviatedDialURI>x-cisco-serviceuri-abbrdial</abbreviatedDialURI>
      <rfc2543Hold>false</rfc2543Hold>
      <callHoldRingback>1</callHoldRingback>
      <localCfwdEnable>true</localCfwdEnable>
      <semiAttendedTransfer>true</semiAttendedTransfer>
      <anonymousCallBlock>0</anonymousCallBlock>
      <callerIdBlocking>0</callerIdBlocking>
      <dndControl>0</dndControl>
      <remoteCcEnable>true</remoteCcEnable>
      <retainForwardInformation>false</retainForwardInformation>
      <uriDialingDisplayPreference>1</uriDialingDisplayPreference>
    </sipCallFeatures>
    <sipStack>
      <sipInviteRetx>6</sipInviteRetx>
      <sipRetx>10</sipRetx>
      <timerInviteExpires>180</timerInviteExpires>
      <timerRegisterExpires>3600</timerRegisterExpires>
      <timerRegisterDelta>5</timerRegisterDelta>
      <timerKeepAliveExpires>120</timerKeepAliveExpires>
      <timerSubscribeExpires>120</timerSubscribeExpires>
      <timerSubscribeDelta>5</timerSubscribeDelta>
      <timerT1>500</timerT1>
      <timerT2>4000</timerT2>
      <maxRedirects>70</maxRedirects>
      <remotePartyID>true</remotePartyID>
      <userInfo>Phone</userInfo>
    </sipStack>
    <autoAnswerTimer>1</autoAnswerTimer>
    <autoAnswerAltBehavior>false</autoAnswerAltBehavior>
    <autoAnswerOverride>true</autoAnswerOverride>
    <transferOnhookEnabled>true</transferOnhookEnabled>
    <enableVad>false</enableVad>
    <preferredCodec>none</preferredCodec>
    <dtmfAvtPayload>101</dtmfAvtPayload>
    <dtmfDbLevel>3</dtmfDbLevel>
    <dtmfOutofBand>avt</dtmfOutofBand>
    <alwaysUsePrimeLine>false</alwaysUsePrimeLine>
    <alwaysUsePrimeLineVoiceMail>false</alwaysUsePrimeLineVoiceMail>
    <kpml>0</kpml>
    <phoneLabel></phoneLabel>
    <stutterMsgWaiting>0</stutterMsgWaiting>
    <callStats>true</callStats>
    <offhookToFirstDigitTimer>15000</offhookToFirstDigitTimer>
    <silentPeriodBetweenCallWaitingBursts>10</silentPeriodBetweenCallWaitingBursts>
    <disableLocalSpeedDialConfig>false</disableLocalSpeedDialConfig>
    <startMediaPort>16384</startMediaPort>
    <stopMediaPort>32766</stopMediaPort>
    <natEnabled>false</natEnabled>
    <natReceivedProcessing>false</natReceivedProcessing>
    <natAddress></natAddress>
    <sipLines>
      <line button="1" lineIndex="1">
        <featureID>9</featureID>
        <featureLabel></featureLabel>
        <proxy>USECALLMANAGER</proxy>
        <port>5060</port>
        <name>{Extentions}</name> //
        <displayName>{Display_Name}</displayName> //
        <autoAnswer>
          <autoAnswerEnabled>0</autoAnswerEnabled>
        </autoAnswer>
        <callWaiting>3</callWaiting>
        <authName>{Extentions}</authName> //
        <authPassword>{Extentions_password}</authPassword> //
        <contact></contact>
        <sharedLine>false</sharedLine>
        <messageWaitingLampPolicy>3</messageWaitingLampPolicy>
        <messageWaitingAMWI>0</messageWaitingAMWI>
        <messagesNumber></messagesNumber>
        <ringSettingIdle>4</ringSettingIdle>
        <ringSettingActive>5</ringSettingActive>
        <forwardCallInfoDisplay>
          <callerName>true</callerName>
          <callerNumber>true</callerNumber>
          <redirectedNumber>true</redirectedNumber>
          <dialedNumber>true</dialedNumber>
        </forwardCallInfoDisplay>
        <maxNumCalls>5</maxNumCalls>
        <busyTrigger>4</busyTrigger>
        <recordingOption>enable</recordingOption>
      </line>
    </sipLines>
    <externalNumberMask></externalNumberMask>
    <voipControlPort>5060</voipControlPort>
    <dscpForAudio>184</dscpForAudio>
    <ringSettingBusyStationPolicy>0</ringSettingBusyStationPolicy>
    <dialTemplate></dialTemplate>
    <softKeyFile></softKeyFile>
  </sipProfile>
    <!-- Only if you want to change the display language -->
    <!-- <userLocale>
        <name>german_germany</name>
        <uid>9</uid>
        <langCode>de_de</langCode>
        <version>1.0</version>
        <winCharSet />
    </userLocale>

    <networkLocale>german_germany</networkLocale>
    <networkLocaleInfo>
        <name>german_germany</name>
        <version>1.0.0.0-1</version>
    </networkLocaleInfo> -->

    <idleTimeout>0</idleTimeout>
    <authenticationURL></authenticationURL>
    <directoryURL></directoryURL>
    <informationURL></informationURL>
    <messagesURL />
    <servicesURL></servicesURL>
    <idleURL></idleURL>
    <dndCallAlert>5</dndCallAlert>
    <phonePersonalization>1</phonePersonalization>

    <commonProfile>
        <phonePassword>{admin_config_password}</phonePassword>
        <callLogBlfEnabled>2</callLogBlfEnabled>
    </commonProfile>

    <vendorConfig>
        <disableSpeaker>false</disableSpeaker>
        <disableSpeakerAndHeadset>false</disableSpeakerAndHeadset>
        <useEnblocDialing>1</useEnblocDialing>
        <enableAudibleAlert>false</enableAudibleAlert>
        <enableMuteFeature>true</enableMuteFeature>
        <enableLldpSwPort>0</enableLldpSwPort>
        <enableLldpPcPort>0</enableLldpPcPort>
        <spanToPCPort>0</spanToPCPort>
        <webAccess>0</webAccess>
        <sshAccess>0</sshAccess>
        <settingsAccess>1</settingsAccess>
        <loggingDisplay>1</loggingDisplay>
        <forwardingDelay>1</forwardingDelay>
        <pcPort>1</pcPort>
        <garp>1</garp>
        <voiceVlanAccess>0</voiceVlanAccess>
        <autoSelectLineEnable>1</autoSelectLineEnable>
        <moreKeyReversionTimer>5</moreKeyReversionTimer>
        <autoCallSelect>1</autoCallSelect>
        <ehookEnable>0</ehookEnable>
        <sideToneLevel>0</sideToneLevel>
        <sendGain>0</sendGain>
        <handsetHeadsetMonitor>1</handsetHeadsetMonitor>
        <RingLocale>0</RingLocale>
    </vendorConfig>
</device>
SETMAC.cnf.xml
위와 같이, SIP서버를 넣을 수 있는 부분과 SIP서버의 Auth를 진행 할 수 있는 부분이 있다.
{}로 감싸저 있는 부분을 자기 Server 및 Service에 맞게 수정한다.
SEPmac.xml 파일에서 해당 부분을 수정하고 tftp서버 root directory에 넣어두면, Cisco IP Phone에서는 SEPAABBCCDDEE.cnf.xml 파일을 자동으로 불러와, 세팅을 진행한다.
세팅이 완료되면, 재부팅이 되고, Phone is registering.. 이라는 문구와 함께 Setting이 진행이 된다.
맥 주소는 "대문자"로 적어야 한다.
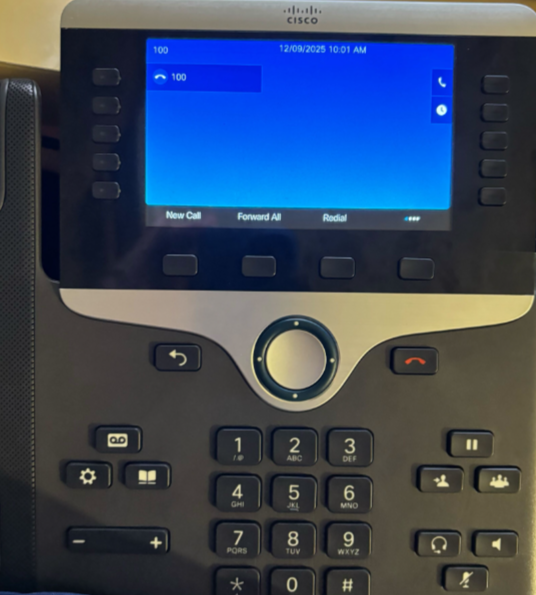
이후 진행이 되면 왼쪽 첫번째에 SEPMAC.cnf.xml에 넣었던 Username 번호가 나타나게 되고, 전화를 걸 수 있게 된다.
이 포스트에서 사용된 firmware file, 즉 Cisco IP Phone 88xx Series의 10.3 Version의 firmware가 필요하다면, blog @ dobob.kr로 문의 주길 바란다.
If you need a 10.3 version of Cisco IP Phone 88xx Series, Please contact to me via blog @ dobob.kr.